The Hisense TV black screen issue occurs for several reasons, and the most common ones are problems with connections, power settings, and the TV’s firmware. Luckily, it’s only a temporary problem, and you can easily fix it. Here’s how to fix the black screen problem on your Hisense TV.
Table of Contents
Hisense TV Black screen
Soft reset your Hisense TV to solve the black screen issue. First, unplug the cord from the wall outlet and wait for one minute. Press the power button on your Hisense TV and hold it for 30 seconds. Wait for 15 seconds and turn the TV back on.
If your problem is not solved, try these troubleshooting methods.
How to Fix Hisense TV Black screen?
1. Unplug the Power Cord from the Wall Socket
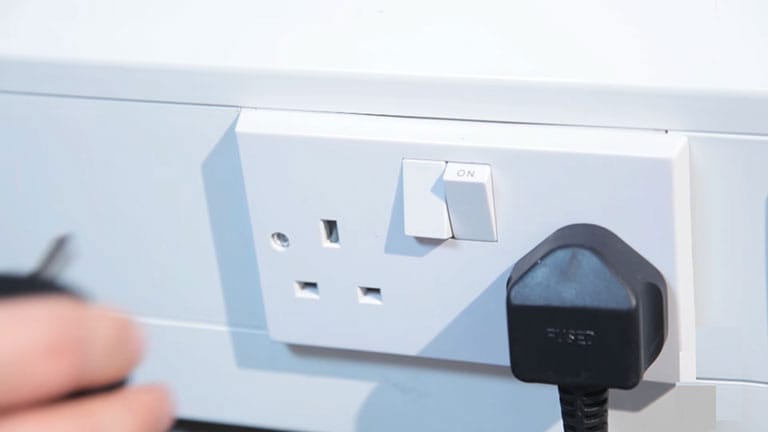
If your Hisense TV suddenly shows a black screen, try to unplug the power cord from the wall socket and wait for one minute. Press and hold the power button on your TV for at least 30 seconds. It’ll allow the TV to soft reset itself. Plug the cord into the socket and turn on your TV. It should work.
If you’re using a Roku device, you can soft reset the Hisense TV from the settings page. It’ll help you solve the Hisense Roku TV black screen issue.
- Take your Roku remote and press the Home button.
- Navigate to System.
- Scroll down and select System Restart> Restart and press OK.
2. Check the Power Source
If your TV is receiving insufficient power, it will show a dark or dim screen. You can try different power sockets to resolve the problem. If you’re using a surge protector or a power strip, try to plug the cord directly into the wall socket instead.
3. Check all the Connected Cables
If soft resetting doesn’t do the trick, try to check all the connected cables to the TV, especially HDMI cables. It’s because streaming devices like Firestick and Roku require an HDMI connection, and if the HDMI cable is damaged or loosely connected, you’re likely to see a black screen error.
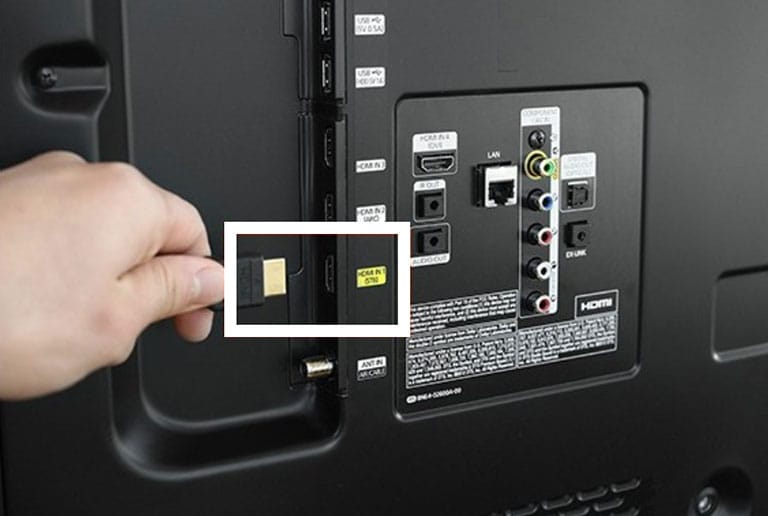
So, ensure that all cables are securely connected to their respective ports.
You can also try connecting the HDMI cord to different ports to see if that fixes the issue.
If your issue is not resolved, try to inspect the issue with the cable.
- Go to the Menu and select Settings.
- Scroll down and select Support> Device Care.
- Now, select Self Diagnosis and choose the Signal Information> HDMI Cable Test> Start Test option.
The TV will scan for any issue with the signal. If it displays any problem, you need to replace the cable. The best alternatives for replacing the cables are the Belkin Ultra HDMI 2.1 and the Cable Matters Polarized Power Cord.
Along with the cables, try to inspect the HDMI ports too. Clean the ports using isopropyl alcohol if dirty and ensure that the HDMI ports are not physically damaged.
4. Check the Input Sources
Sometimes, we incorrectly connect devices like Roku, Blu-ray players, a PlayStation, or an Xbox to the Hisense TV. As a result, we face the Hisense TV dark screen problem.
The first thing you need to do is to unplug the TV from the wall socket and wait for one minute.
Now, connect the external device to the TV. Make sure to connect the wires firmly.
Turn on your TV and press the power button on both the external device and the TV.
If the device is powered on, proceed to the next step. If not, contact the manufacturer of the external device.
Take your Hisense TV remote and press the “Source” or “Input” button. You’ll see options like TV/AV, HDMI 1, Screen Mirroring, USB, and many more.
Now, select the right input source. If you’ve connected the external device to the HDMI 1 port, select the “HDMI 1” option in that Menu.
However, you can also edit the names of the input modes to make it easier for you to switch between them.
5. Update Hisense TV OS
Sometimes, using outdated firmware could result in the Hisense TV black screen issue. Follow the steps to update the Hisense TV OS.
- Take your remote and press the Home button.
- Navigate to Settings.
- Scroll down and select Support.
- Now, select “Software Update> Update Now” and press enter.
The TV will check for the latest updates, and if found, it will download and install them.
6. Factory Reset your Hisense TV
If updating the OS doesn’t work, it’s time to factory reset your TV. It’ll solve all the software-related problems. Before doing a factory reset, make sure you back up the necessary stuff.
Factory reset your Hisense TV when the screen is visible:
- Take your Hisense remote and press the Home button.
- Go to Settings.
- Scroll down and select Support> Self Diagnosis.
- Select the Reset option, enter the security pin (0000), and press OK.
- Once the reset is complete, set up the TV correctly.
Factory reset your Hisense TV when the screen is partially visible:
If you can see a dim image on the screen, then press the Exit button on your remote and hold it for 12–15 seconds. Now, select OK to reset your TV.
Follow these steps to know how to reset Hisense TV with no picture:
- Plug the power cord into the wall socket and turn the TV on.
- Find the reset button on the body of your Hisense TV. You can also refer to the user manual or search for the name of your TV model online to locate it.
- The reset button will be inside a pinhole labeled “Reset”.
- Get a safety pin or non-metallic pointed object.
- Use it to press the button and then hold it until your TV restarts.
Once the reset is complete, set up the TV correctly to reduce any risk of getting errors in the future.
7. Check the Issue with the Backlight
If your TV is not showing pictures on the screen, but you hear the audio, it’s likely because of a failure in one of the LED power strips.
To check the backlight issue, take a flashlight or turn on the flashlight on your phone and close all other lights in the room. Turn on your TV and shine the flashlight closer to the screen.
If it is working fine, you’ll see a dim image on the screen. Take your remote and give some commands to the TV, like changing the volume or channels, to see if the TV responds.
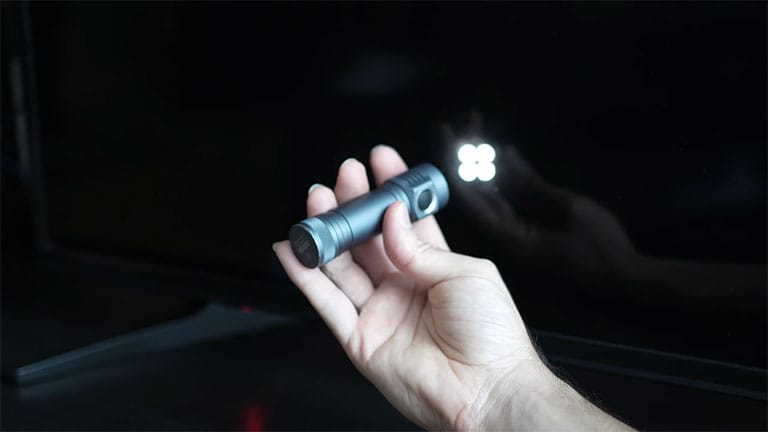
Try to move the flashlight around the screen to see if there are some changes on your TV’s screen. If you hear any sound, you’re also likely to see some dim pictures too.
If you can control your TV from the remote and see a dim image on the screen, it means your TV’s mainboard and T-CON are working fine.
In this case, the problem lies with the LED backlights of your TV.
Now, you’re left with two options: either contact Hisense for help or do it yourself to save the cost of repairs.
However, it’s best to contact Hisense if your TV is under warranty, as disassembling it will void its warranty. If the warranty period is over, try dismantling the TV if you’re well aware of its internal circuitry.
You can also compare the cost of repair with that of a brand new TV to know if the part is worth replacing.
8. Replace your Hisense TV LED Backlight Strips
If you’ve decided to replace the LED backlight strips, there are some things that you should know before doing it.
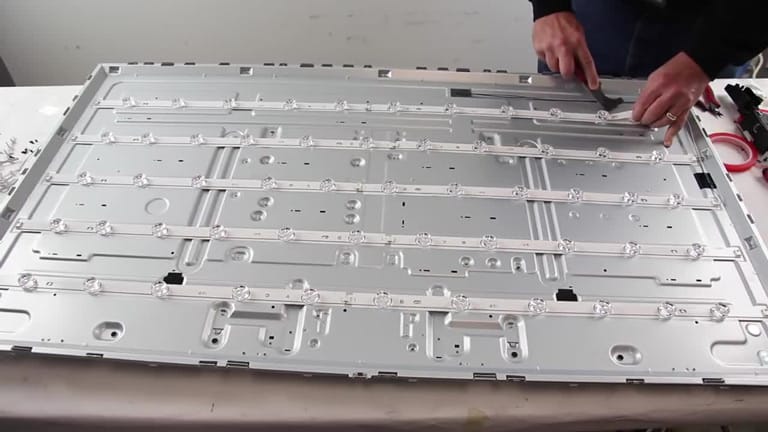
- If one light in the strip breaks, then the complete strip set won’t work.
- You can buy the strips online by searching for the exact model name.
- You should try to replace the entire strip because replacing a single LED light is quite a hassle.
- Be ready, as there are many screws that you’ll need to remove. Plus, you’ll also need to disassemble the expensive and fragile glass panel.
The cost of replacing the strips depends on the number of strips you need. Hisense TVs have more than nine LED backlight strips, depending on the model you have. Mostly, the cost is between a hundred and two hundred dollars.
Replacing the LED backlight strips on your own is a good option to save money on official repairs. It also helps you to solve other issues, like if the screen is dim or if one side of the TV has an image and the other does not.
Note: If you’re unfamiliar with disassembling the Hisense TV, contact Hisense customer service to get professional help.
9. Replace the T-CON Board
The T-CON board creates an image on the Hisense TV screen. If you do not see any picture on the screen when you shine the flashlight on the TV, it’s likely because of a broken T-CON board.
Replacing the T-CON board is far easier than replacing the LED backlights.
Find the model number of your TV and search for it on any search engine. You can buy the T-CON board for under a hundred dollars from any online marketplace, such as Amazon or eBay.
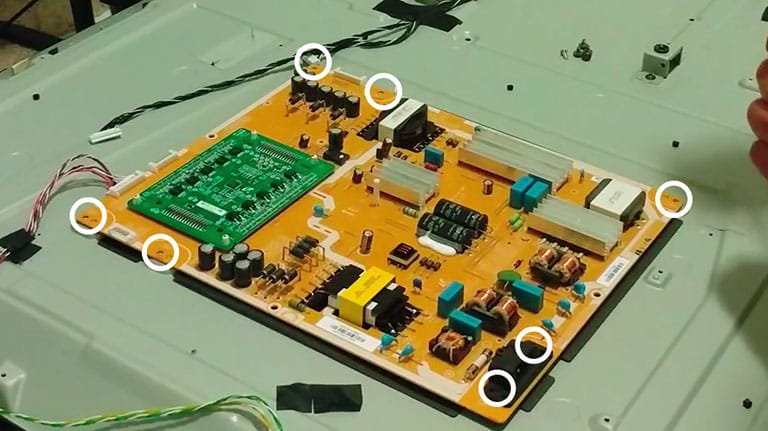
Remove the back panel of your TV. Put the screws in a safe place.
Disconnect the ribbon cables attached to the T-CON board. Usually, there are 2-3 ribbon cables connected to it.
Now, remove the four screws, take the old T-CON board out, and place the new one in the same location.
Once you do it, assemble the TV and soft reset it. It should now work.
10. Hisense TV Support and Warranty
If none of the above methods helped you solve the issue, try contacting Hisense support to get professional help.
However, Hisense offers a 1-year warranty on most of its products. If your TV is under warranty, you might get the work done without spending too much.
Frequently Asked Questions

To reset the Hisense TV, locate the pinhole on the TV’s body that is labeled “Reset.” Use a non-metallic pointed object to press and hold the reset button until your TV restarts.
If you see a black screen when you turn the TV on, try to inspect all the connections, especially the HDMI connections. If the cables are firmly connected, and there is no problem with them, then factory reset your TV to fix this issue.
Power cycle your Hisense TV to get pictures back on the screen. First, unplug the power cord from the wall outlet, and wait for one minute, and then plug it back in. It should work. If your issue is still not resolved, factory reset your Hisense TV by pressing the reset button on the back panel for 10–20 seconds.
Soft reset your TV using the Roku remote to fix this problem. Press the Home button on your remote. Now, navigate to System> System Restart> Restart and press OK.
The Bottom Line
If you’re facing the Hisense TV dark or black screen issue, follow these proven fixes to solve this problem.
- Perform a soft reset
- Check the power source
- Check all the connected cables
- Check the input sources
- Update Hisense TV OS
- Factory reset your Hisense TV
- Check the issue with the backlight
- Replace your Hisense TV LED backlight strips
- Replace the T-CON board
- Hisense TV Warranty and Support
Hopefully, one of these fixes has helped you solve the problem. Were you able to fix the Hisense TV black screen issue? Let me know which one worked for you in the comments below!
