iPhone users increasingly complain that their message app does not display old texts and messages. Also, since the phone shows that the messages are indexing, one cannot see their message history.
This occurrence typically occurs following an update to your phone’s software, most commonly iOS 13. Is it an issue to do with the Messages app? Or perhaps a phone-related matter?
To completely comprehend what it means while your texts are in the indexing process, please read the entire article to understand how to resolve this problem.
Table of Contents
What Does it Mean When Messages are Indexing?
Some of the content on your iPhone needs to be reindexed after each significant software upgrade. This can include text messages and any attached multimedia. The indexing procedure typically takes some seconds to finish.
It might, however, take longer in some circumstances. This can happen when the iPhone encounters an indexing issue. The messages won’t be available for you to see. Instead, you’ll receive a notification telling you that more results will be displayed after messages complete indexing.
Don’t panic; the messages are still accessible and remain on your iPhone. If the problem persists for a while, you can use the techniques below to fix it.
How to Fix Messages Indexing Issue in iPhone
There are multiple formulas on how you can fix the issues. I’ll paint out a few methods and the steps you can follow.
1. Restart Your Device
Restarting the iPhone should be your initial step. It might assist in resolving the messages indexing problem. The following steps will guide you:
- On your iPhone, go to Settings and select General. After that, scroll down to search and tap Shut Down.
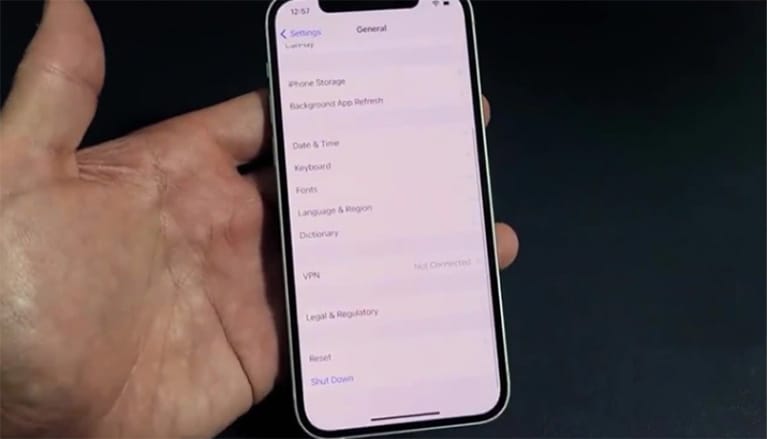
- Here, you will come across a slider. Swipe it to the right to turn off the phone.
- Long-press your iPhone’s power button to switch it back on.

You can now launch the Messages application and wait a short while. After that, check to see if the indexing has begun. All of the messages will get indexed and be present through search.
2. Adjust the Settings for Search Indexing
You can update or modify the indexing settings on an iPhone. You can solve the problem by updating the settings. However, you must ensure your Messages application is listed among the search apps. Follow these steps to modify these settings:
- Launch your phone’s Settings, go ahead and press Siri & Search.
- From the new page, toggle down to get and tap on Messages.
- You will find various options on Messages. Ensure you enable all of them.
- If any settings are disabled on Messages, be sure to enable them.
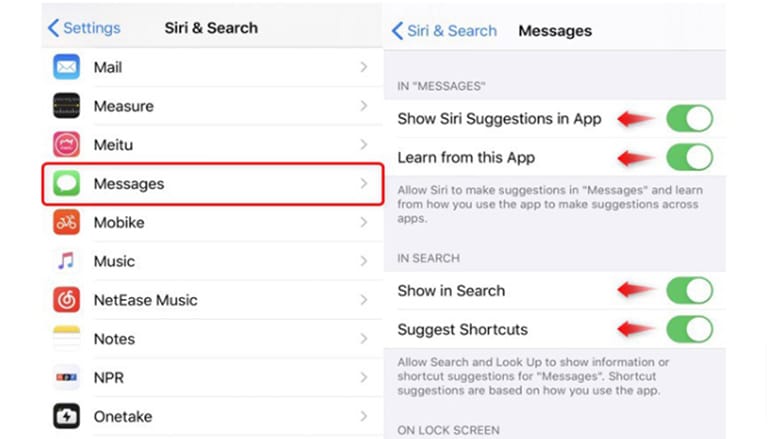
- On the contrary, you may turn off the choices and re-enable them if all are enabled.
Once this is complete, you may return to the Messages application to see if the indexing is proceeding at a reasonable pace. If so, you will soon be able to access all of your messages.
3. Change the Settings of Your iPhone’s Language
Indexing issues might also be brought on by incorrect language settings. Make sure your iPhone’s language settings are set correctly by checking them. Here’s how to go about it:
- Go to the General option in the Settings app on your iPhone. Next, click Language & Region.”
- You’ll see a list of languages provided. Choose the language you would like to use.
- When you’re finished, click Siri & Search on the General Settings page.
- Open Languages by searching for it on the new page. Then, select your favorite language as you did earlier.
4. Update the iPhone Again
The Messages Indexing problem is extremely often if you recently updated to iOS 13. You don’t need to be concerned because Apple has solved the issue in subsequent versions. Therefore, ensure that iOS 15 or iOS 13 is the most recent version you are using.
To make an iPhone software update, you need to:
- Launch Settings and select General.
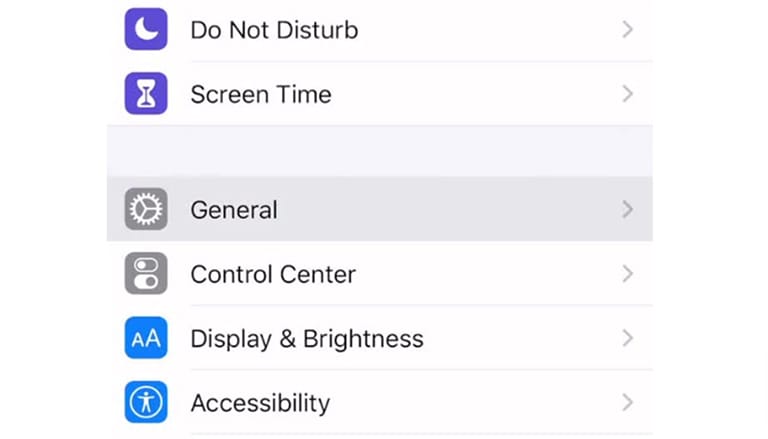
- Click on Software Update.
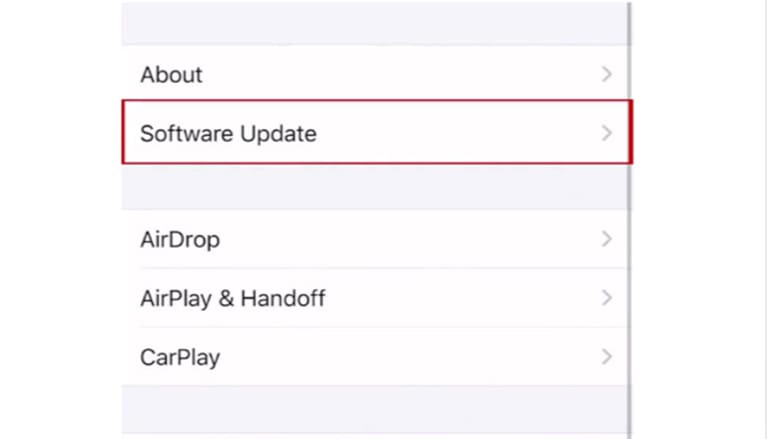
- Wait until your phone requests the update.
- Follow the directions on-screen to finish the installation procedure.
You should no longer experience the indexing error since you have upgraded to the most recent version of iOS.
5. Switch off iCloud to Allow Local Backups
Whenever iCloud is enabled, fewer things are stored on your iPhone. Not much has changed in the case of Messages.
To check if the iCloud backup is the root of the indexing error, you can stop it for some time. To do this, take the following steps:
- Open Settings, followed by Apple ID and iCloud.
- Turn off iCloud Backup.
- You will now be prompted to decide if you wish to download all of the content. Click Yes.
This will guarantee that all messages and other items on the device are locally accessible.
If you select “yes,” you will access your messages locally on the device. You can retrieve all texts using the Search feature once the Messages app is done indexing the information. You can turn on iCloud once more at this point.
6. Turn iCloud Messages Off and On
This problem can occasionally be attributed to iCloud. Other times, there are issues with iCloud syncing to the messaging app. To ensure that this program is operating properly, reset iCloud Messages. Don’t forget to download your iCloud messages as a backup before that happens to prevent any data loss.
When you do this, you’ll be restarting the indexing of Messages.
- Open your iPhone’s Settings app first. You should note that this applies to both iPad and iPhone devices. To access iCloud, click the Apple ID settings.
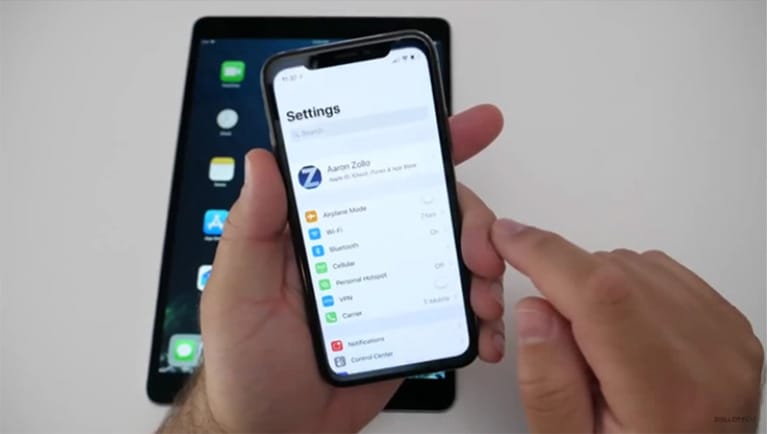
- Select iCloud to access the apps that are synced with it. Remember these apps are all turned on by default. You’ll need to turn them off in this situation.
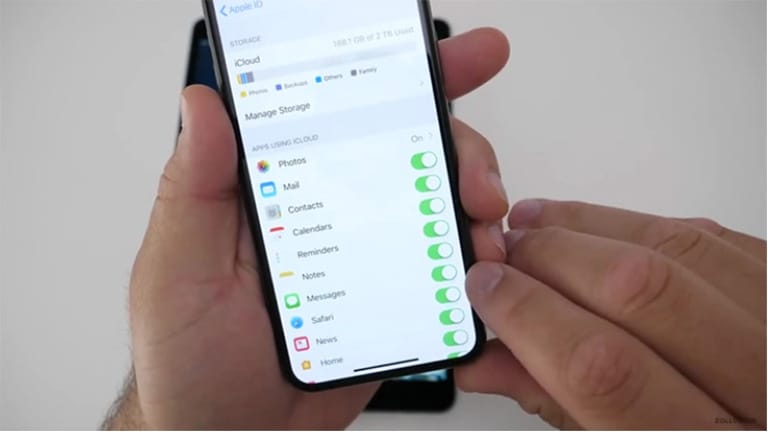
- Restart your phone after turning off the iCloud sync for messages. The device’s message indexing process will continue with this procedure.

Be aware that you must have a strong internet connection for your iOS device to successfully re-sync the iCloud with the Messages and interact with the iCloud server. You can speed up indexing by following these steps.
7. Sync Messages from Your Mac or iPad Device
You won’t have to be concerned about losing your messages if your iPhone’s iCloud is enabled. The iCloud server will back up all your phone’s data and messages.
So long as your iPad, Mac, or other Apple devices have been signed into the same iCloud account, you can access the messages whenever you like.
8. Restoring from iTunes Backup
You might consider having to restore your iPhone from an earlier iTunes backup if none of the techniques mentioned above work for you. Let’s see how:
- Connect the PC to your iPhone and launch iTunes or Finder. If necessary, enter the passcode.
- Tap the iPhone icon in the upper-left corner of the iTunes window.
- Then select Summary/General, followed by Restore Backup.
- To restore, select the most recent iTunes backup file. After the restore, all your texts will be backed up to the iPhone.
How to View Photos, Links, Attachments, and Images in the Messages app
The experience with iMessage/Messages is improved by iOS 13’s feature-packed version. Not only does iOS allow you to send messages with screen or bubble effects, but it also allows you to personalize new emoji stickers.
Additionally, finding attachments is made simpler by the upgraded search feature. The ways listed below may help you use it in the Messages app.
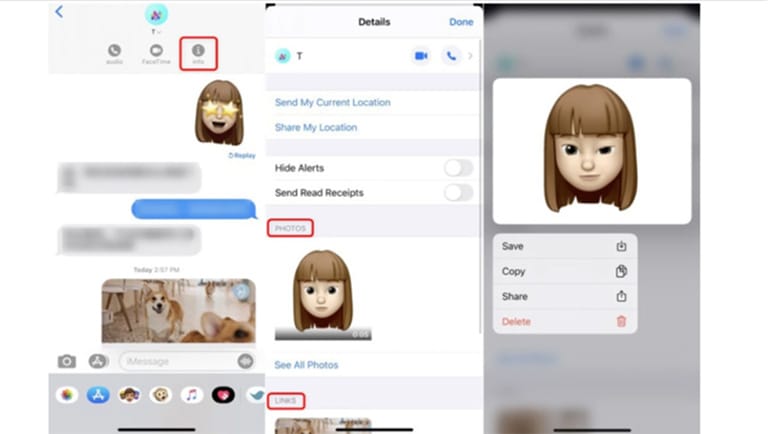
1. View Attachments Through “i”
- Launch the message box which you would like to view.
- Select the contact name at the top. After that, click “i.” In the info details, you’ll be able to see attachments, videos, photos, and links you sent with that contact.
- Pick and hold on the photo to display the Copy, Save, Delete, and Share options.
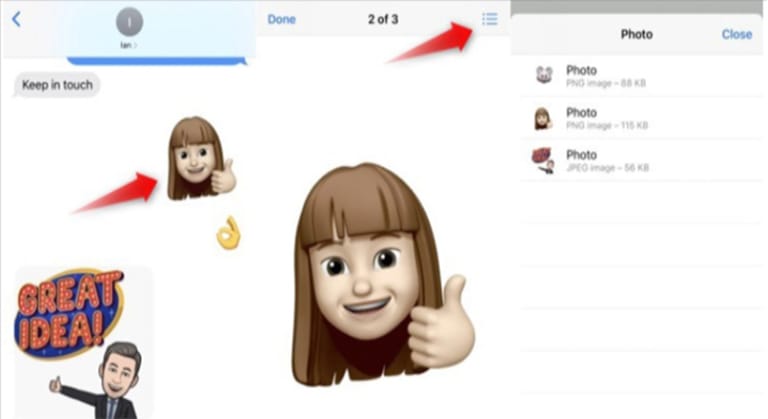
2. Click One Photo to View Every Photo Attachments
- Go to the message.
- Click on any photo.
- To view all photographs and videos, click the Menu button (three-horizontal-line) in the upper-right corner. When you click any video, the three-horizontal-line will appear in the bottom-right corner.)
3. Utilize the Search Box for Viewing
- Go to the Messages app.
- Scroll down and click on the Search bar. You’ll find attachments and frequently contacted here.
- Tap “See All” to see all Screenshots and Photos.
Frequently Asked Questions

The Texts application will reindex all of your messages after updating the iPhone to iOS 13 on your computer. The number of texts that need to be reindexed will determine how long it takes. If you have a lengthy message history stretching many years, it can take a day.
When you delete an SMS from your iPhone, it won’t stay gone forever. First, a copy of it is given to the network provider. The iPhone’s internal database is the only one to mark it as deleted.
If you used a synced device to send or receive a message, the device is available as long as you’ve synced it to an iCloud.
It is where the system inserts the messages into the database if your iPhone shows it’s indexing a message. It’s done this way so that the Search feature can retrieve the messages.
iPhone indexing is the process by which your iPhone searches through various files and makes them all accessible for easy retrieval. The built-in database will fuel both the Universal Search and the in-app search features.
Your iPhone will automatically index messages. The procedure could, however, occasionally become delayed or stuck. If this happens, you can reset your phone and try again.
Wrapping Up
A lot of people are having trouble searching old text messages in the Messages app. Although dealing with this can be difficult, this article will lead you through many solutions. You can explore these troubleshooting techniques, and am sure they will solve your issues.
